
Changelog

Follow new updates and improvements to Insight Cloud.

Clarifying questions in Intelligence
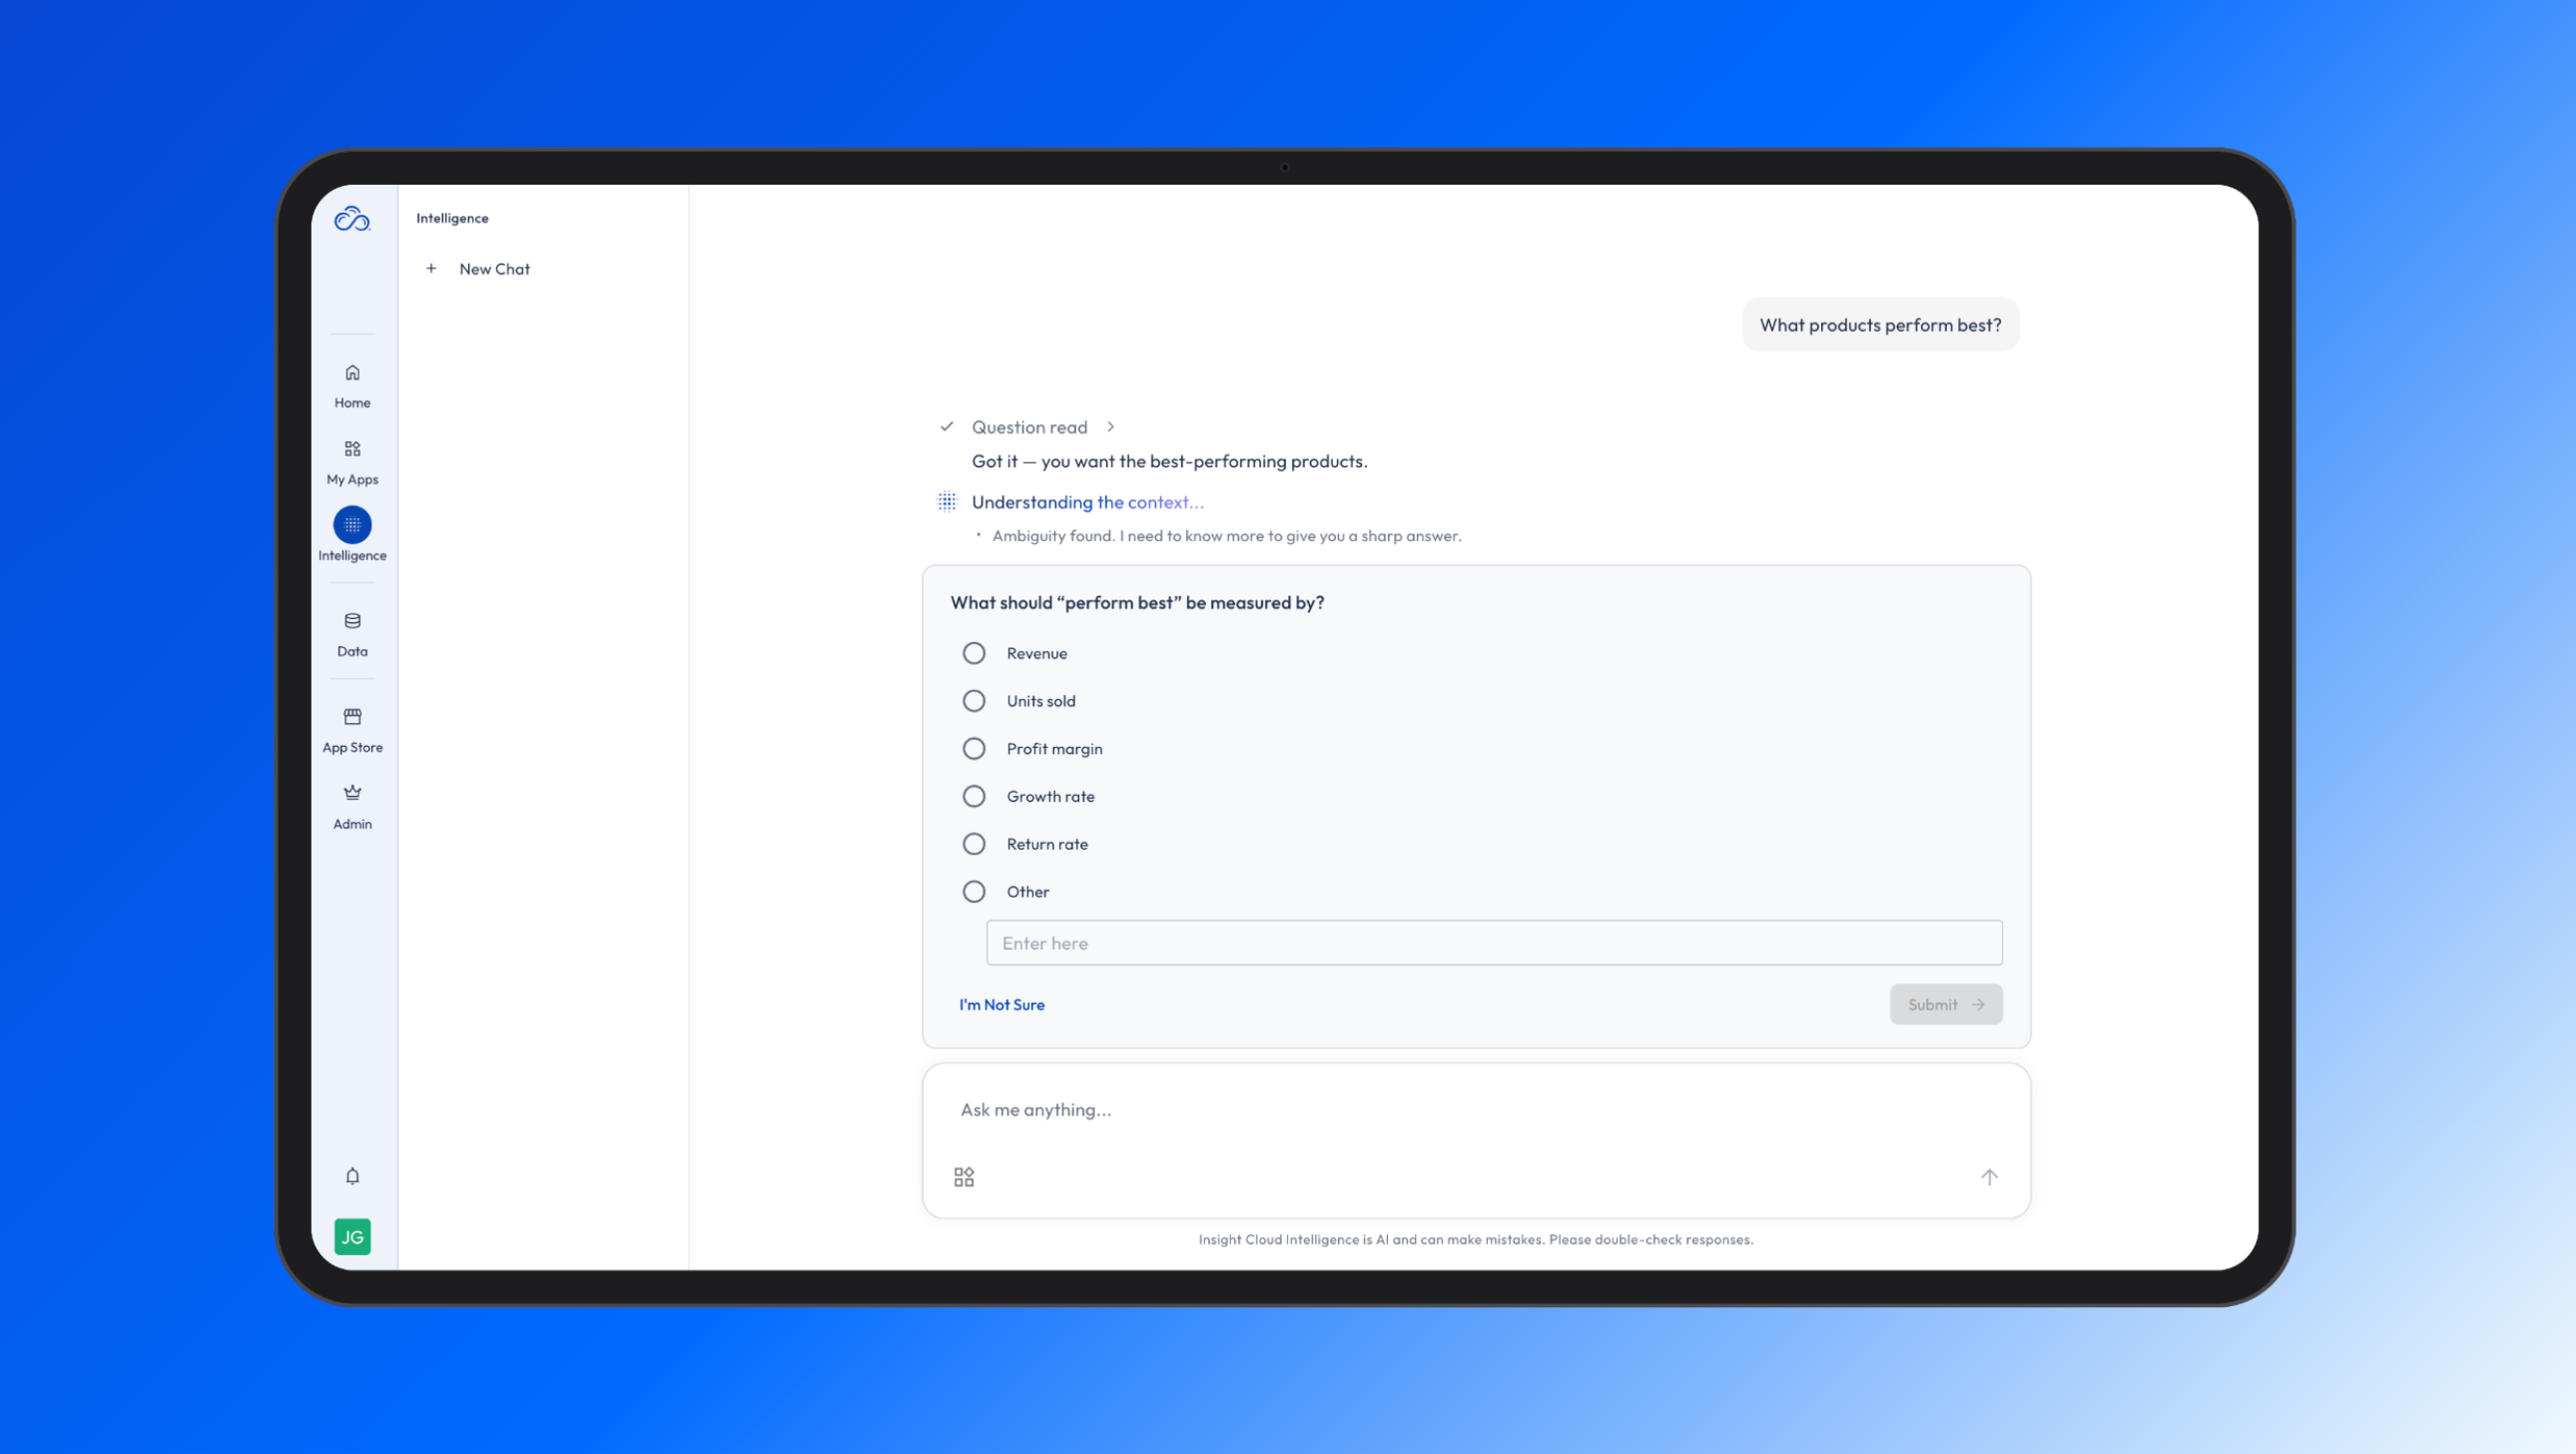
Clarifying questions
The fastest path to the right answer starts with the right question - and beginning today, Intelligence helps you get there faster than ever.

When your question could lead to more than one answer, Intelligence helps you get to the one you intended.  Quick clarifying questions - informed by your context and responses - get you a better, sharper answer from the start. No unnecessary rephrasing or back-and-forth needed.

Sidebar → Intelligence → ask your question.

You'll only see clarifying questions when you need them.

The smartest questions, and the sharpest answers - natively built into Insight Cloud.

Visit the Help Center for more details.

Feature Releases (x2) - Data Layer & Notifications Center!

Data Layer: Explore and Export Your App Data!

What's new

There’s a new Data section in the Insight Cloud sidebar. It gives you one place to browse and inspect the datasets that power your apps – no direct Snowflake access needed.

Why it matters

Every app produces its analysis from underlying datasets. Until now there was no in-platform way to see that data. Data Layer lets you find those datasets, understand what’s inside them, and pull the rows you need for your own work.

What you can do now

  • Browse every dataset your account has access to, organized by app and variant.

  • Open a dataset to see the data (Data Viewer), the schema (Columns), and the inputs that produced it (Parameters).

  • See row counts and when each dataset was last updated.

  • Filter by any column, and copy the URL to share your filtered view with a colleague.

  • Export results to CSV. The export runs in the background and you get a Notification Center alert when your file is ready to download.

How to use it

  1. Open Data in the sidebar and expand an app to see its datasets.

  2. Click a dataset to open the Data Viewer.

  3. Filter columns to narrow down to the rows you need.

  4. Click Export. When the notification arrives, download your CSV.

Heads up

There is no row limit on exports, but there is a size limit. An export must fit into one compressed file of 5 GB. Most exports never come close to this limit, but an unfiltered export downloads the entire dataset and may be larger. Full guidance is in the Help Docs.

… and …

Notifications Center

What's new

There's a new Notifications Center in Insight Cloud, sitting next to your user menu near the bottom of the side navigation. Look for the classic bell icon to alert you when something new arrives.

Why it matters

Many workflows in Insight Cloud finish while you're doing something else. Until now that information had nowhere to live.

What you can do now

  • Get notified on new types of activity in the platform the moment they're ready.

  • See all your notifications in one list, newest first.

  • Click straight through from a notification to the what it's about.

  • Keep the ones that matter, mute the ones that don't.

  • Clear notifications you've handled so the list stays useful.

How to use it

  1. Click the bell icon next to your user menu at the bottom of the side navigation.

  2. Scan your notifications (unread items are highlighted at the top).

  3. Use links provided in notifications to see more.

  4. Open notification settings to mute the types you're not interested in.

Something to note

We aim to hold a high bar for what becomes a notification, and you can always lower the volume further on anything you don't need.

Read more about the Notifications Center in the Help Docs.

Feature Release - Shared App Views!

We’ve changed how apps load so your team can save and share the same view and custom views to collaborate better within Insight Cloud.

What's new

Everyone who shares access to the same app and variant now loads the same underlying view of the dashboard. As a result, views are now shared along with app access!

Why it matters

Everyone with access to an app variant now shares the same set of views and default settings. This gets rid of repetitive setup in order to share a view or an idea. This creates a collaborative environment where you and your team can more easily be on the same page, viewing the same information!

What you can do now

- Save a shared bookmark that everyone on the variant can open

- View shared bookmarks created by others

- Set a default bookmark for your team or organization to view every time the app opens

How to use it

1. Open your App and apply filters

2. Open the bookmark icon and choose to save as new view

3. Give it a name and optionally set it as default

4. Click save and that’s it! Other users of this app will have access to your view!

Full step-by-step instructions are in our help docs on Saved Views.

Heads up: Bookmarks are tied to the app such that if an app is significantly updated, older bookmarks may need to be recreated as well.

Improved

Earlier updates